Process and quality control
What kind of quality is required can vary significantly for different parts and customers. Mechanical strength is required for most welded parts. For others, the tightness of a weld seam can be decisive and for some also the visual appearance of the weld seam.
The various quality controls can be differentiated according to whether they are carried out before, during or after the welding process:
Pre-process
The delivered of self manufactured parats can be checked before welding:
- dimension tolerances
- laser transmission
- melting behaviour
For measuring specific instruments as used in quality laboratories from specialized third-party suppliers are employed typcially. In most cases, not every part is checked by itself, but a sample of a new delivery or a production lot.
In-process
Depending on the type of welding process and sensors in the welding machine, following measurements can be pursued:
- Laser power in laser module or optics
- Electric current and voltage at laser module
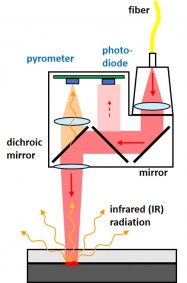
- Temperature by pyrometer
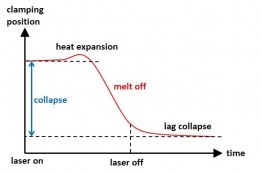
- Collapse path by displacement sensors
On the one hand, the measurement data can be analyzed for a quality statement after welding (open loop). On the other hand, the laser can also be controlled during the welding process based on the measured values (closed loop).
Post-process
After the welding process, tests can still be carried out at the welding machine itself or in a downstream position in the production process in order to already weld the next parts again. Depending on the parts and the required functionality, many different tests can be carried out:
- Pressure or vacuum tests for leak tightness
- Mechanical tests below destruction threshold
- Weld seam analysis with camera and image processing
- ...
Additionally, destructive tests can be carried out by random samples in order to periodically verify the limits of mechanical strength.


